Edjobster sits alongside the hiring tools you already use and gives you one place to screen, schedule and follow up with applicants. Here's a quick walk through the main areas, starting with the home page you land on each day.
Before you start
You're signed in to the Edjobster dashboard.
Setup steps
1
The left navigation
The daily loop sits at the top of the menu: Dashboard, Inbox, Jobs, Candidates, Scheduling and Tasks. Below it sits Hiring tools (screening runs, the JD directory, analytics, profile search, email templates and cadences). Workspace admins also see Workspace settings and Privacy. Account at the bottom holds your profile and feedback, plus billing for admins. Badges on Inbox, Scheduling and Tasks count what is waiting for you, and admins also see a badge on Email templates for drafts waiting for their approval.
2
Today
The home page opens on your day: interviews at their times, tasks that are due or overdue, and email replies waiting for an answer. Each row takes you to where you act on it. The My work / Whole team switch at the top decides whether you see only your own interviews and tasks or everyone's, and remembers your choice.
3
Needs you and Pipeline
Below the day, Needs you lists everything waiting on a person: applications to triage, candidates to score, interview outcomes to record, approvals and reviews. Pipeline shows how many active applications sit at each stage, from Applied to Hired, and Recent open jobs links to the roles you're hiring for. Workspace owners also get a short Workspace line with connection health and the plan when either needs attention.
4
Light or dark
The moon and sun icon in the header switches the app between light and dark. The choice is remembered on this browser.
5
Inbox
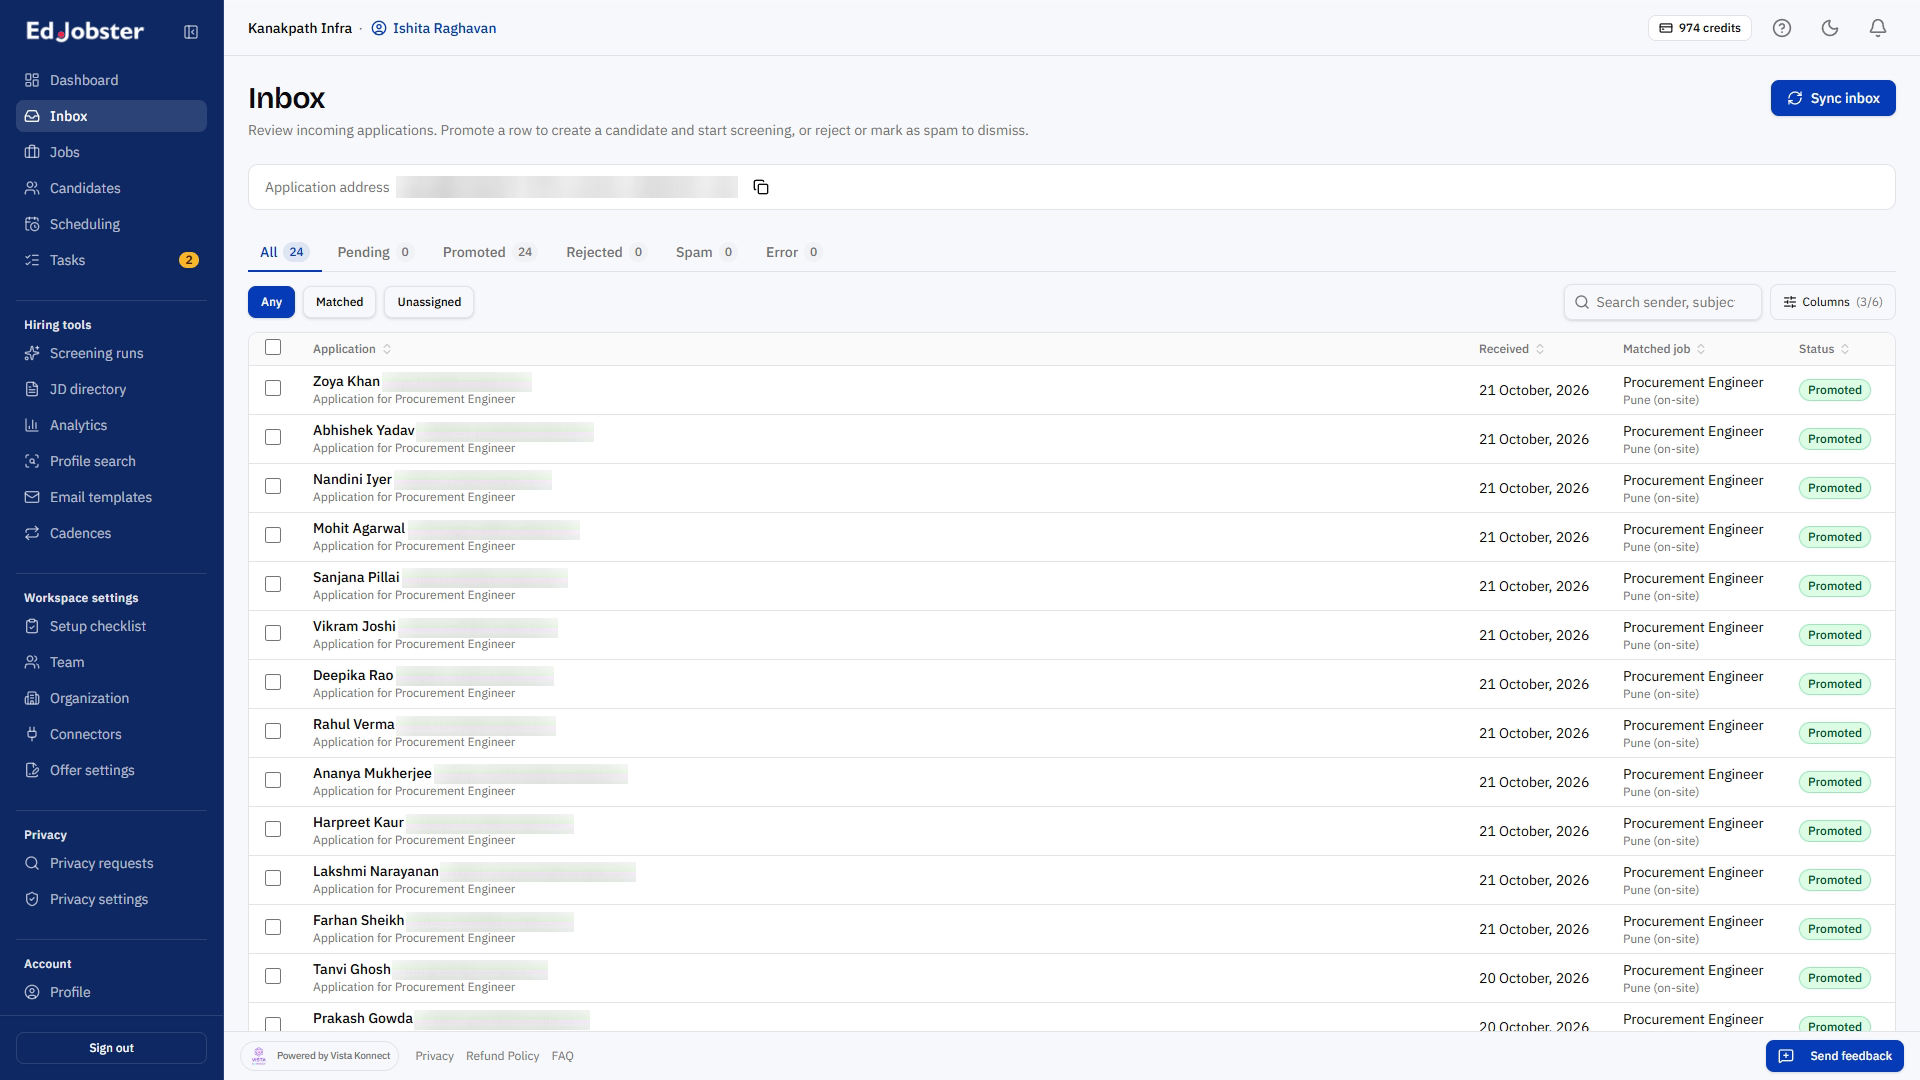
Applications that arrive by email wait here. Promote a row to create the candidate and start screening, or reject it or mark it as spam to dismiss it.
6
Jobs
Your open roles. Each job carries the screening rubric (the must-have and nice-to-have criteria) used to score its applicants.
7
Candidates
Everyone pulled in from your connectors, searchable and filterable by score band, so your shortlist is one filter away.
8
Scheduling
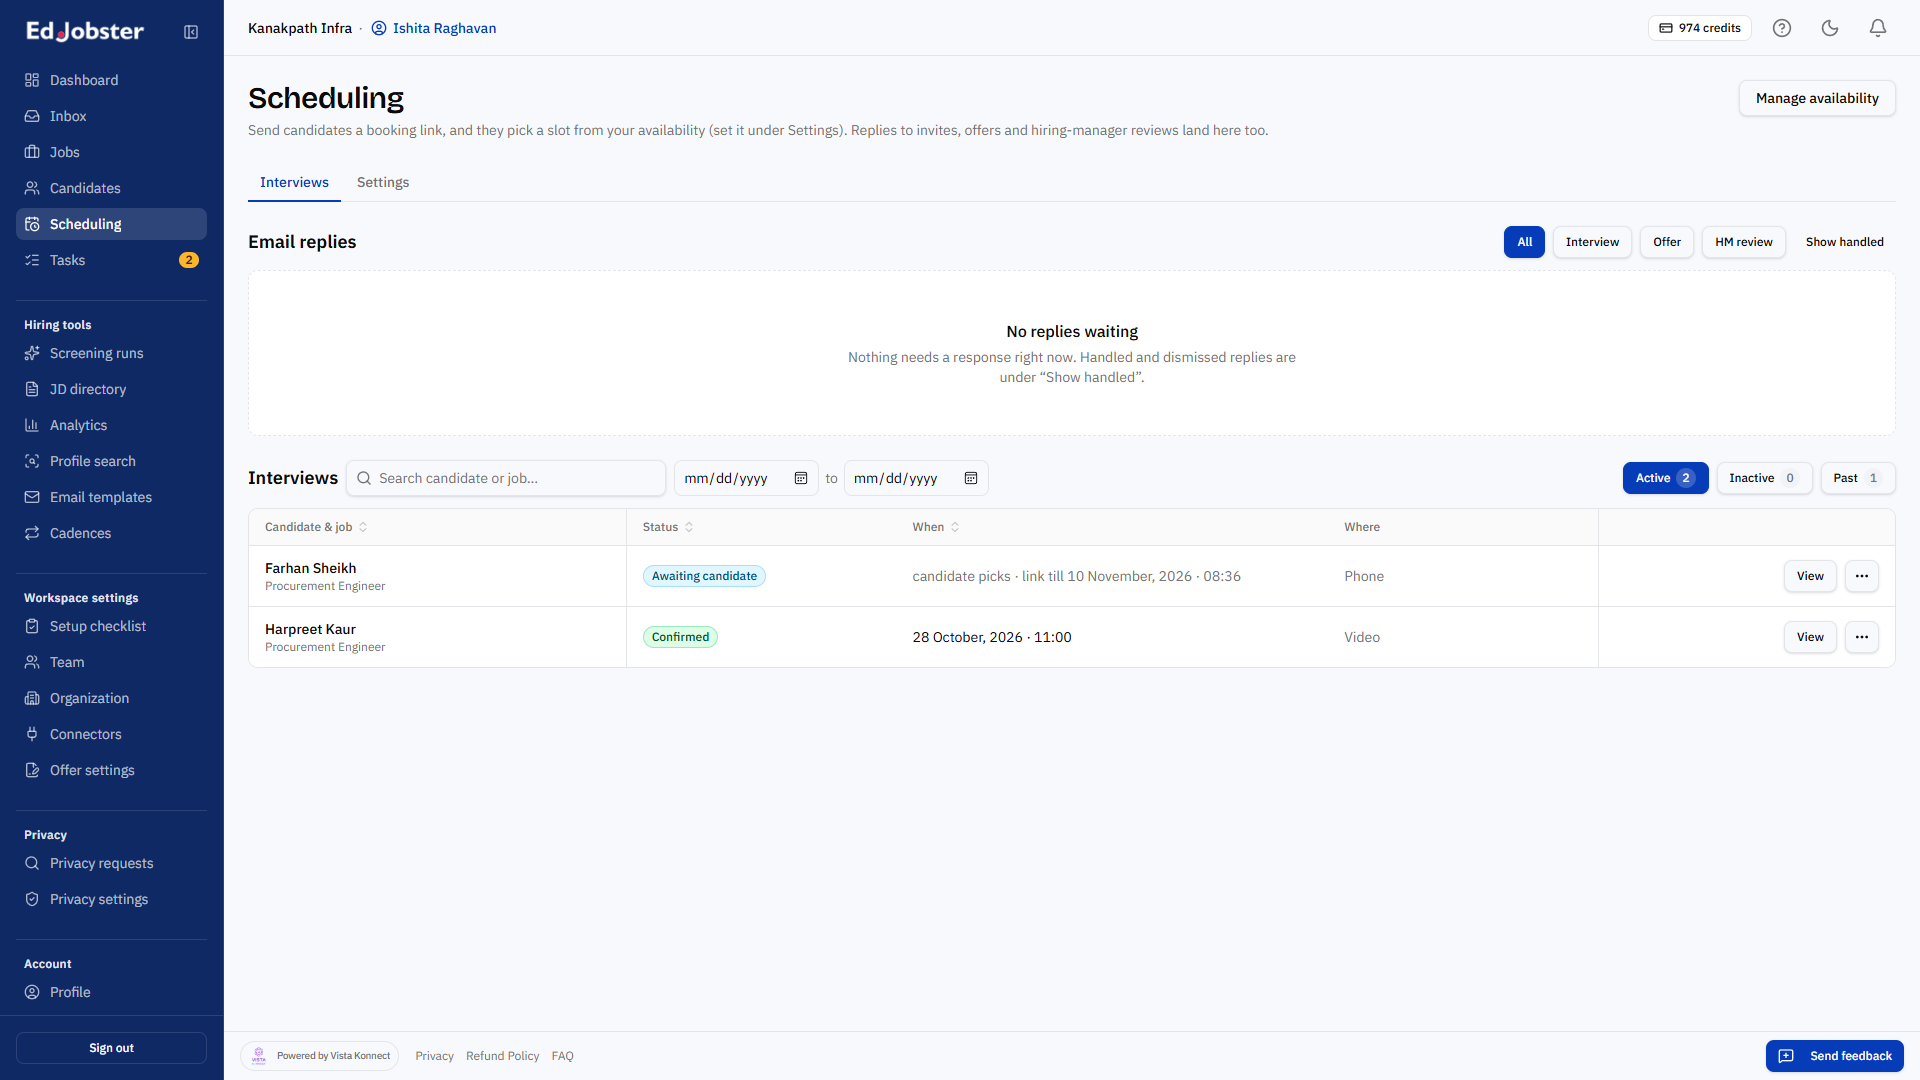
Interviews and the replies to them. Send a candidate a booking link from their page or a job's applicants, and they pick a slot from your availability, which you set under Settings. Replies to invites, offers and hiring-manager reviews land here too.
9
Tasks
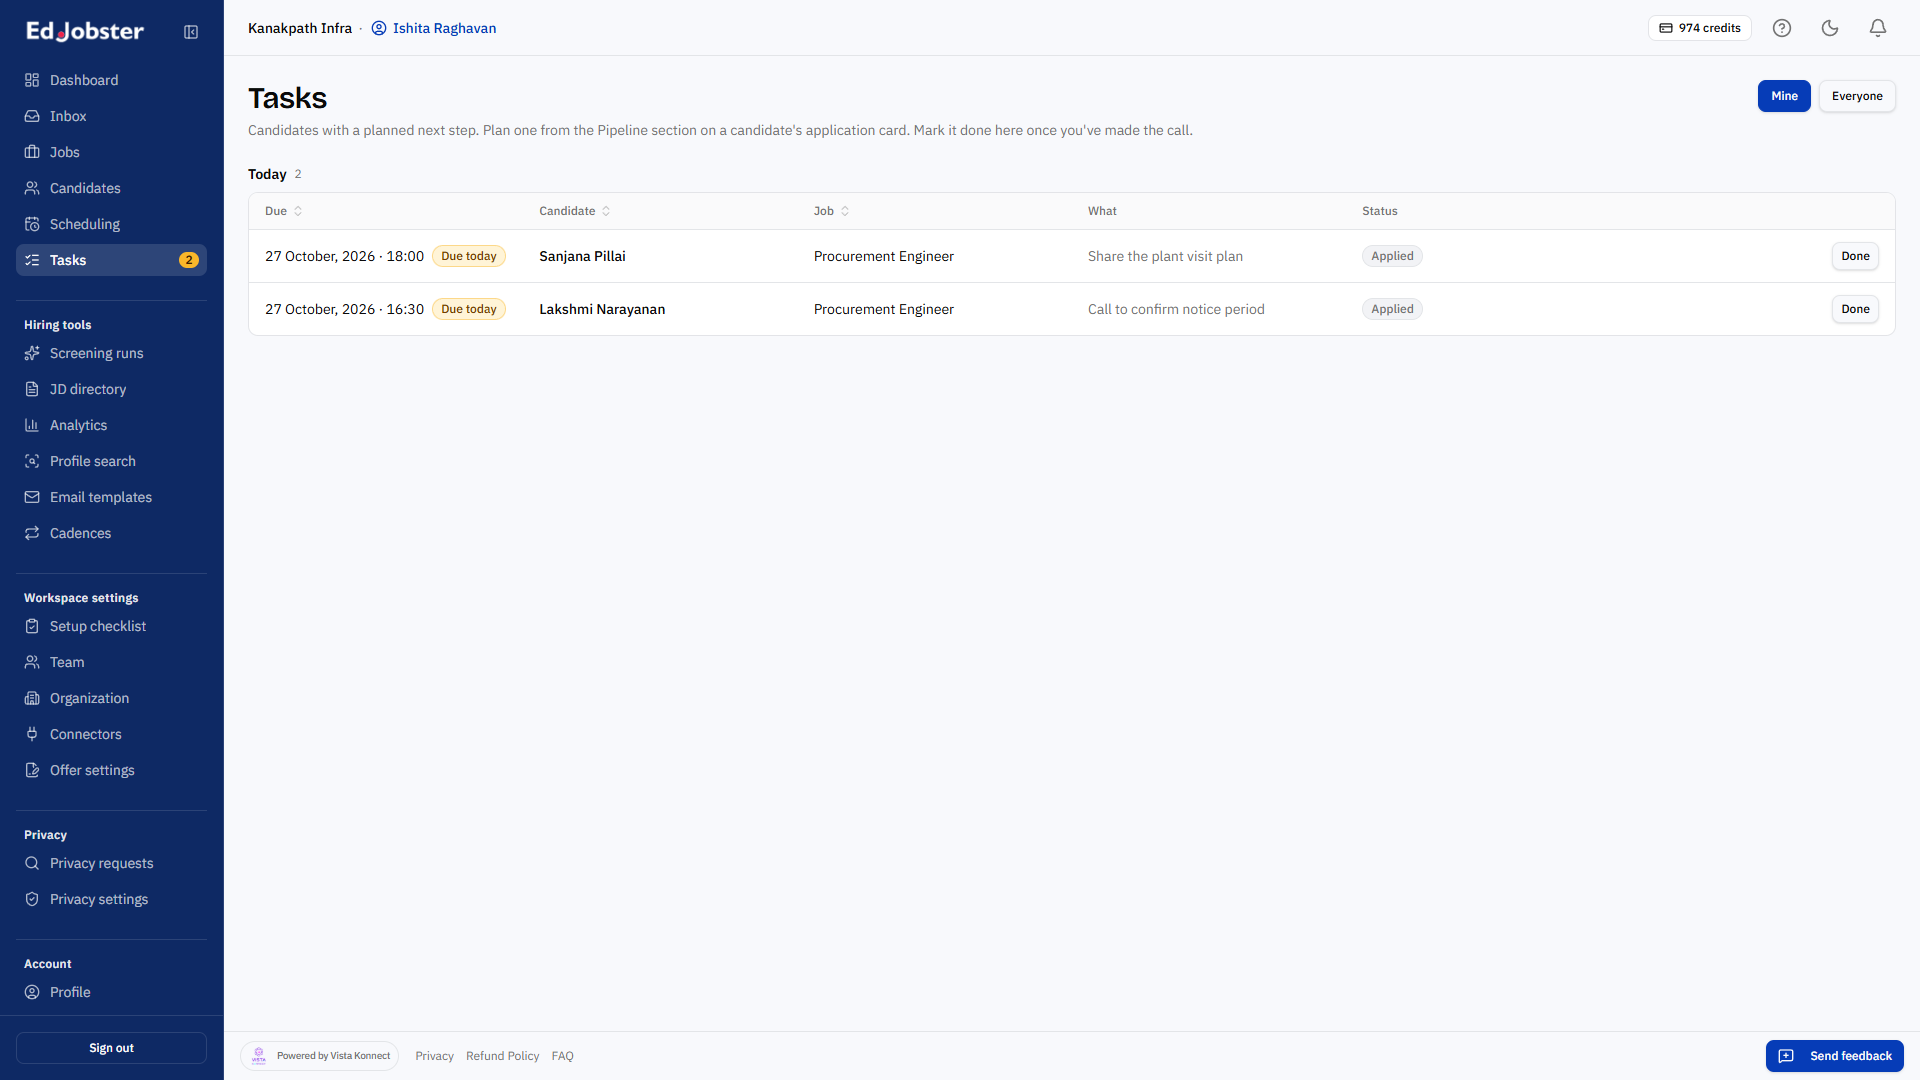
Candidates with a planned next step. Plan one from the Pipeline section on a candidate's application card, and mark it done here once you've made the call.
10
Screening runs
Every screening run, most recent first. Open a run to see each candidate's outcome, or retry the ones that failed.
11
Connectors
For workspace admins, under Workspace settings. Connect your ATS, your inbox, a Google Sheet, or the Chrome extension. See the connector guides for each one.
12
Billing
For workspace admins, under Account. Your plan, the credits you have left, where they came from, and a history of every credit-affecting event.
Verify it worked
You know where your day starts (Today), where the waiting work is listed (Needs you), and where the inbox, jobs, candidates, scheduling, tasks, screening runs, connectors and billing live.
Troubleshooting
Some menu items aren't showing.
Menus are gated by your plan and role. Workspace settings, Privacy and Billing show for workspace admins only, and the ATS connectors (Zoho Recruit) and some team features appear only on the plans that include them. Ask your workspace owner if you expect to see one that's missing.