Connect a Google Sheet (usually a Google Form's response sheet) so new applicant rows come into Edjobster, are matched to a job and screened, and the results are written back into the sheet.
Edjobster reads only the spreadsheet you connect (plus read-only access to list your sheets and fetch resumes uploaded through the Form), and writes screening results back into that one sheet. It never touches your other files.
Before you start
You're a workspace admin. Only admins connect or change a sheet, and everyone else can sync and screen it.
A Google account you can sign in with.
A response sheet with applicant rows, typically the sheet behind a Google Form, with an email column (it is required), a name, and ideally a résumé/CV column (a Drive upload or link).
A job to assign applicants to. You can create one during setup. If the Form takes applications for several jobs, add a question like Which position are you applying for?
Setup steps
1
Connect Google Sheets
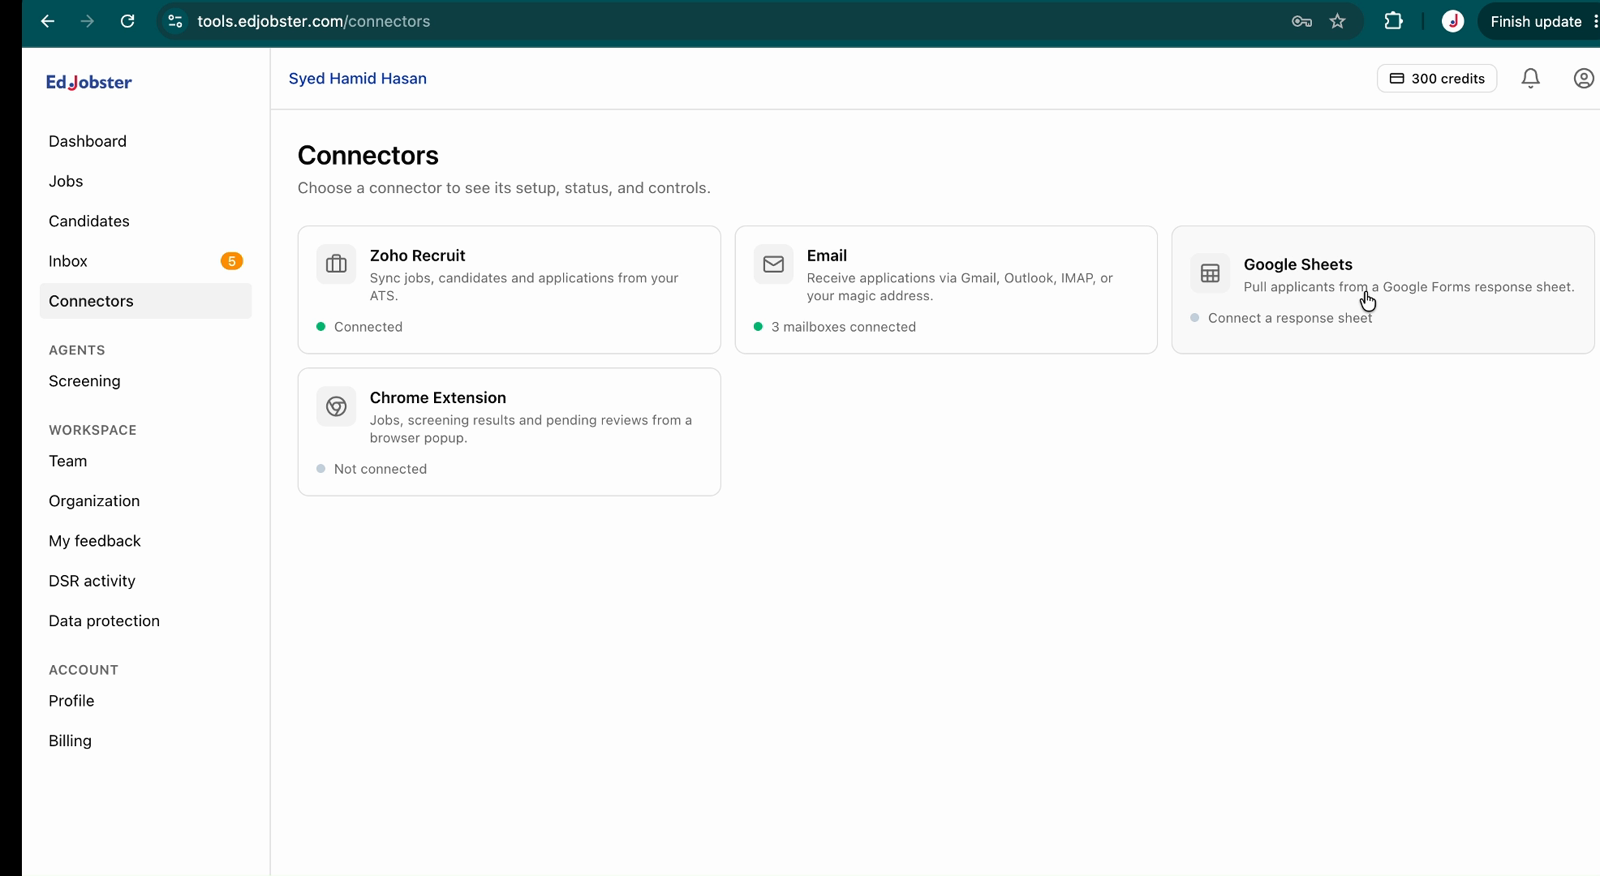
In the left menu, under Workspace settings, open Connectors, choose the Google Sheets tile and click Connect Google Sheets (it reads Add another sheet once one is connected).
2
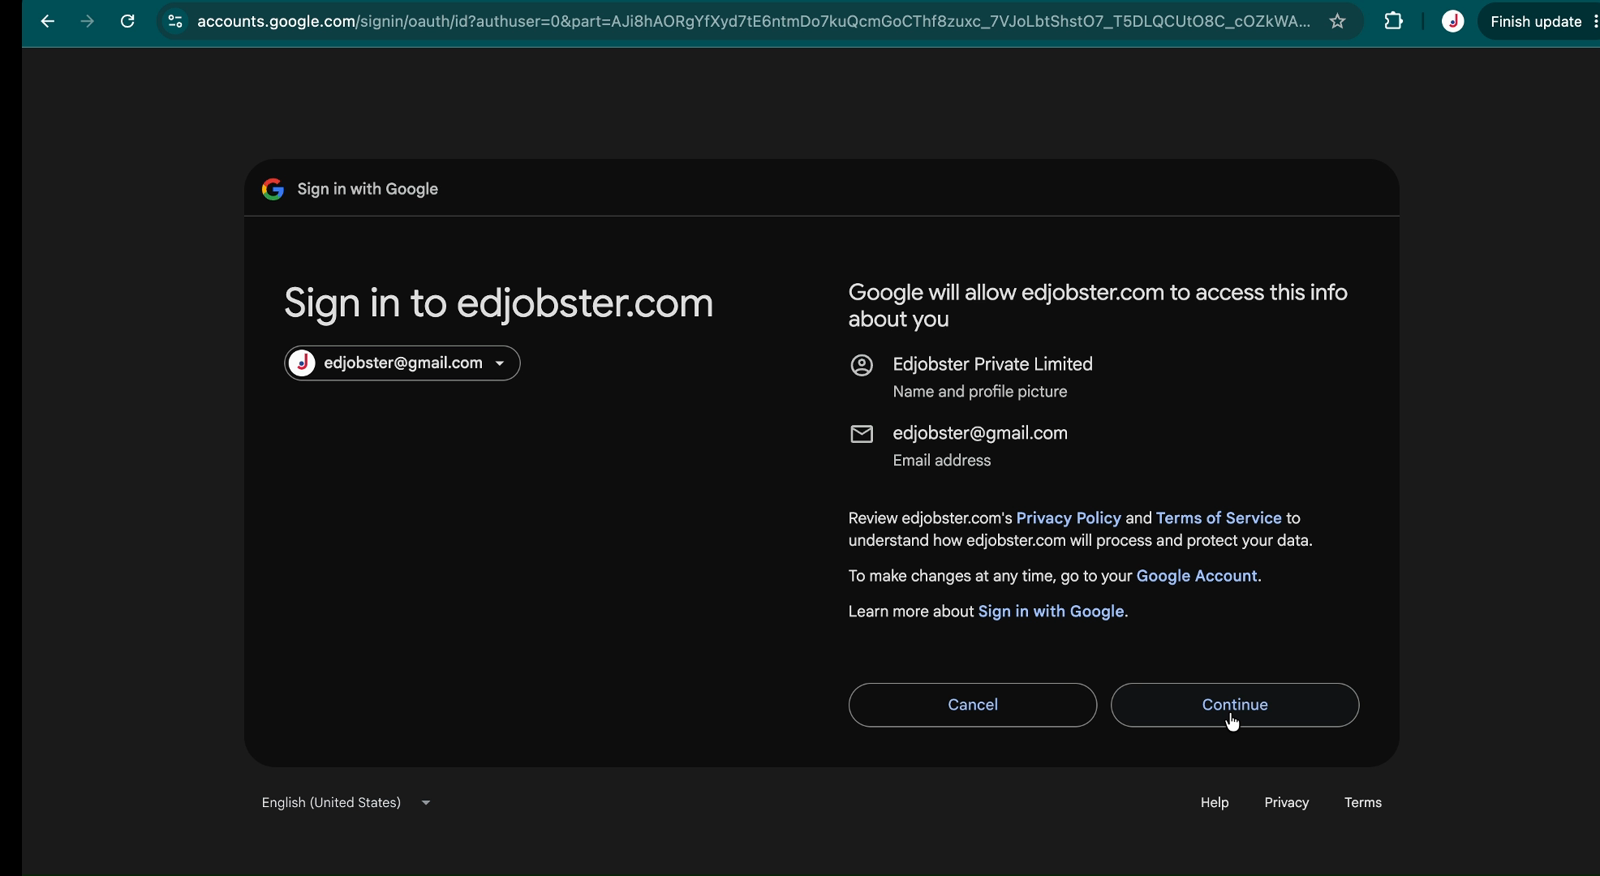
Approve access
Approve access to your spreadsheets and read-only Drive (Drive is used only to list your sheets when you pick one and to fetch Form-uploaded resumes).
3
Pick the spreadsheet and tab
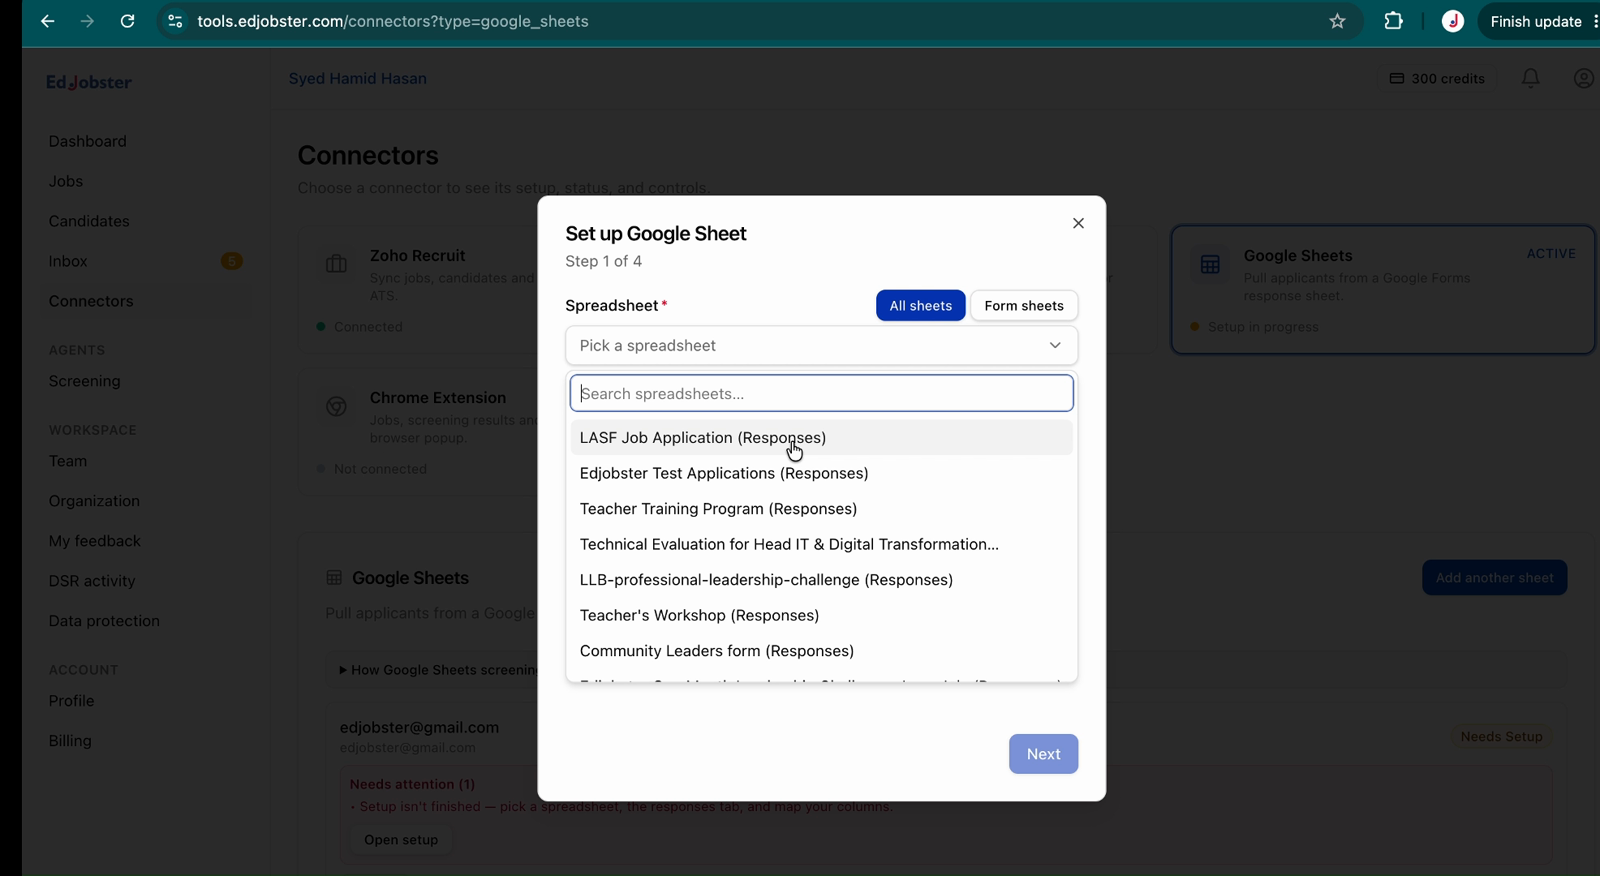
Back in Edjobster, Set up Google Sheet opens on its own. In the first of its four steps, choose the Spreadsheet, then the Responses tab that holds the form responses, and click Next.
4
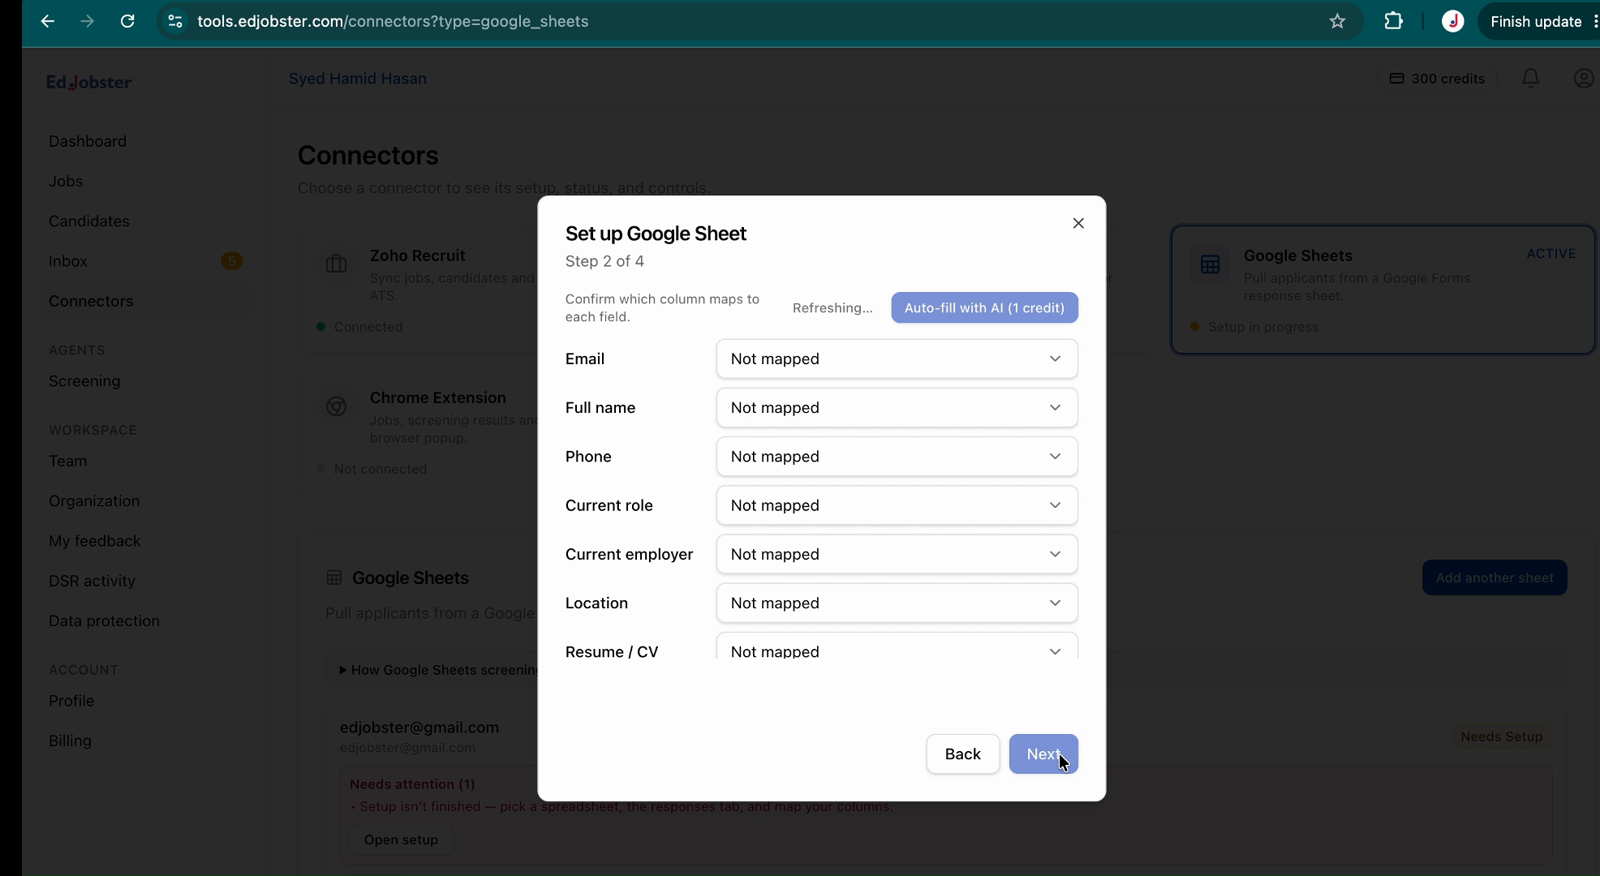
Map your columns
Confirm which column holds the Email, Full name, Resume / CV and the other fields. Edjobster suggests a mapping from your headers for free, and Auto-fill with AI (1 credit) can fill in the rest. Email must be mapped before you can go on.
5
Choose the job, sync mode and auto-screen
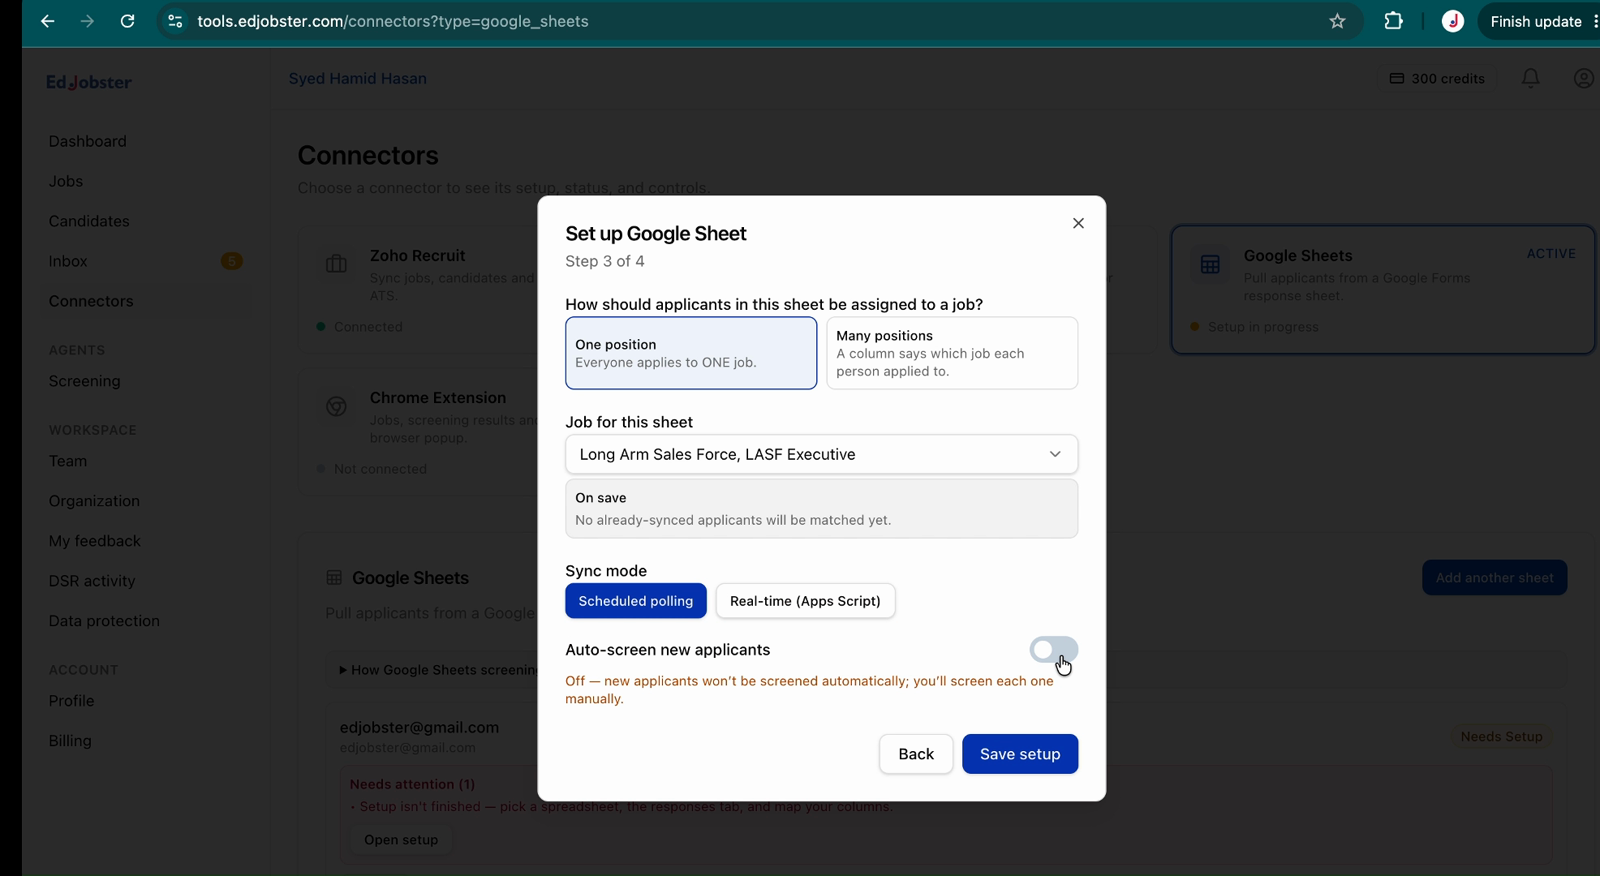
Say how applicants are assigned to a job: One position (pick the Job for this sheet, or create one) or Many positions (pick the column that names the job). Applicants without a job are saved but not screened. Then pick the Sync mode: Scheduled polling checks the sheet every 30 minutes, and Real-time (Apps Script) pushes each response the moment it's submitted. Turn on Auto-screen new applicants to screen them as they arrive (it's off by default, with a per-sync limit that protects your credits), then click Save setup.
6
Finish the setup
The last step depends on your choices. With many positions, map each answer to a job (Map positions to jobs). With real-time sync, click Generate Apps Script, paste the script into the sheet's Extensions → Apps Script, and run installTrigger once. Then click Done.
Verify it worked
The sheet's row on the Google Sheets connector shows how many responses were screened and when it last synced. Screened rows get Edjobster's columns written back (AI Status, AI Score, AI Summary, Report Link, Screened At and Edjobster ID), and the candidates appear in the dashboard and the Chrome extension. With auto-screen off, click Screen now on the sheet to screen the new ones.
Troubleshooting
A candidate's resume wasn't read.
Only Google Drive or Docs links are downloaded, and only when the connecting account can open them. The candidate is still created, and their page says no resume text is on file. Make sure Form file-uploads are accessible to that account.
New responses stopped coming in.
Click Sync now on the sheet to check at once. Problems show in the sheet's Needs attention panel, with Open setup to fix them. After a disconnect and reconnect, real-time sync falls back to polling, so generate and install the Apps Script again.
I edited the Form and the sheet stopped importing.
If a mapped column is renamed or removed, syncing stops and the sheet says which columns are missing. Restore them, or click Edit setup, redo the column step (Refresh columns reads the new headers) and click Save setup.